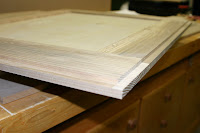
 ...here's the result. The bigger piece (on the bottom) is the 1/2" MDF back. The 3/4" plywood bottom and the two top cleats are sitting on top of that. All of these pieces were cut to final length as described above then ripped to final width on the table saw. The two end panels (made in the last session) will require rabbets in the top, bottom and back to accept the cleats, bottom panel and back panel.
Something to note is that the end panels are opposite hand (or mirrored) from each other. This is because the front and back stiles as well as the top and bottom rails are all different widths due to design considerations. All of the rabbets are cut on what will be the inside of the case or the back of these panels. Once the panels have been oriented, mark the locations for all of the rabbets.
 I'll start with the rabbet for the back. I've installed a sacrificial fence clamped to my table saw's fence. The clamps have been set far enough above the table to clear the panels as I run them though. I've also install my dado blade as set it for a 1/4" height and 1/2" width.
 I then run both panels. After I confirmed the rabbet was sized properly, I moved the fence out to 3/4" and left the height set to 1/4". I then cut the top and bottom dadoes on both panels. After I confirmed those rabbets...
 ...I ended up with this. Now we're ready for some assembly.
I started by laying the back panel horizontal and temporarily clamping the end panels to it, making sure the back panel is completely seated in the rabbets and is flush with the top of the end panels. I then applied some glue in the rabbets on the bottom of the end panels (the picture is looking into the bottom of the carcass).

I then set the bottom piece into the rabbets and against the back panel, aligning the front (up in this picture) flush with the end panels, then tightened the clamps. The bottom is attached to the end panels with some 1-1/4" screws.

The carcass was then flipped so that it sits upright (the bottom is now on the bottom). The back was removed and glue was applied to the rabbets in the end panels and to the back edge of the bottom. It was then reinstalled, aligning the top to be flush with the end panels, and attached to the end panels and bottom with 1-1/4" screws.
This is a good stopping point for now. The next thing we'll tackle is installing the interior panels and the top cleats.

No comments:
Post a Comment